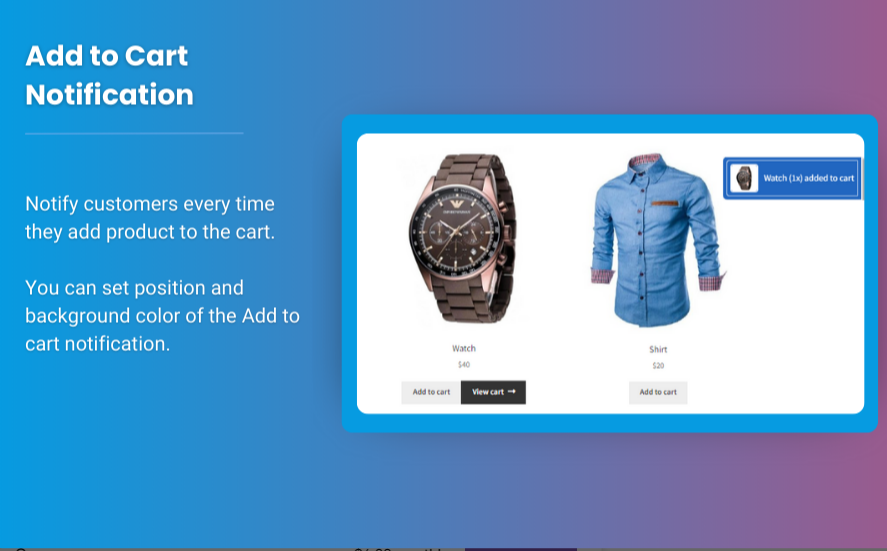
In today’s fast-paced eCommerce world, user experience is everything. When customers are browsing your online store, it’s important to make it as easy and convenient as possible for them to make a purchase. One way to improve your WooCommerce store’s shopping experience is by adding a sticky add to cart WooCommerce feature. This ensures that the “Add to Cart” button remains visible at all times while customers scroll through product pages, encouraging impulse purchases and improving conversion rates.
In this article, we’ll show you how to create a sticky add to cart bar in WooCommerce, explain the benefits of using it, and guide you through the process step by step. We’ll also cover how adding a mini cart for WooCommerce can further streamline the shopping experience. Let’s dive in!
What is a Sticky Add to Cart Bar?
A sticky add to cart bar is a feature that keeps the “Add to Cart” button visible at all times as a customer scrolls through a product page. Rather than disappearing when the customer scrolls down the page, the button stays at the top or bottom of the screen, making it easy for the customer to add items to their cart without having to scroll back up.
This feature can significantly enhance the shopping experience, especially on mobile devices where screen space is limited. A sticky add to cart bar makes the purchase process quicker and more convenient, leading to a smoother checkout process and ultimately, higher sales.
Why Use a Sticky Add to Cart Bar in WooCommerce?
There are several compelling reasons why you should consider adding a sticky add to cart bar to your WooCommerce store. Let’s take a look at some of the benefits:
1. Improved Conversion Rates
One of the main reasons to add a sticky add to cart bar is to improve your store’s conversion rates. With the button always visible, customers are more likely to click it when they decide to make a purchase, even if they’re distracted or deep into the product page.
By keeping the “Add to Cart” button visible and easily accessible, you remove friction from the purchasing process. The easier it is for customers to buy, the higher your chances of conversion.
2. Better User Experience
A sticky add to cart bar ensures a smooth and uninterrupted shopping experience. Customers don’t need to scroll up to add items to their cart or go through multiple steps to purchase. The constant visibility of the button allows for a faster and more intuitive experience, especially on mobile devices where ease of navigation is critical.
3. Encourages Impulse Purchases
A sticky add to cart bar encourages customers to make impulse purchases by making it easy for them to add items to their cart without interrupting their browsing session. Whether they’re scrolling through product images or reading descriptions, the button is always available to add a product to their cart.
4. Increased Mobile Usability
Since many online shoppers now browse stores on mobile devices, a sticky add to cart bar is particularly useful for improving the mobile shopping experience. With limited screen space, having an accessible and always-visible button means customers won’t need to zoom or scroll to find the “Add to Cart” button, which is often frustrating on smaller screens.
5. Promotes the Mini Cart for WooCommerce
When combined with a mini cart for WooCommerce, a sticky add to cart bar can further streamline the checkout process. As soon as the customer adds a product to their cart, they can instantly see the mini cart, view their items, and proceed to checkout without leaving the page. This creates a smooth, quick, and seamless shopping experience.
How to Create a Sticky Add to Cart Bar in WooCommerce
Now that you understand the benefits of a sticky add to cart bar, let’s go over the steps to create one on your WooCommerce store. There are several ways to implement this feature, but the easiest and most effective method is by using a plugin. We’ll show you how to do it step by step.
Step 1: Choose a Sticky Add to Cart Plugin
There are many plugins available that can help you create a sticky add to cart bar in WooCommerce. Some of the most popular options include:
- WooCommerce Sticky Add to Cart by Extendons: A user-friendly and feature-packed plugin that lets you add a sticky add to cart bar to your product pages.
- Sticky Add to Cart for WooCommerce: A simple plugin to create a sticky add to cart button that stays visible on the page.
- WooCommerce Floating Cart: This plugin lets you display a floating shopping cart that follows the customer as they scroll, along with the sticky add to cart feature.
For this guide, we’ll focus on WooCommerce Sticky Add to Cart by Extendons because it’s easy to use and comes with a lot of customization options.
Step 2: Install the Plugin
- Go to your WordPress dashboard.
- Navigate to Plugins > Add New.
- Search for WooCommerce Sticky Add to Cart by Extendons.
- Click Install Now, and then activate the plugin.
Once activated, you’ll see a new section in your WooCommerce settings to customize the sticky add to cart bar.
Step 3: Customize the Sticky Add to Cart Bar
Now that the plugin is installed, it’s time to customize the sticky add to cart bar according to your store’s design and branding. Here’s how you can adjust the settings:
- Go to WooCommerce > Settings and click on the Sticky Add to Cart tab.
- Customize the button’s position, whether you want it to appear at the top or bottom of the page.
- Select the background color and text color to match your store’s branding.
- Enable or disable options like showing the product name or displaying a mini cart when the item is added to the cart.
You can also set rules for when the sticky bar appears, such as after the user scrolls a certain percentage down the page.
Step 4: Add a Mini Cart for WooCommerce
If you want to further enhance the shopping experience, integrating a mini cart for WooCommerce with your sticky add to cart bar is a great idea. This allows customers to view their cart without leaving the page, making it easier to add or remove items before proceeding to checkout.
Here’s how you can integrate a mini cart:
- In the plugin settings, enable the mini cart feature.
- Choose whether you want the mini cart to appear as a pop-up or a floating sidebar.
- Customize the mini cart’s appearance, such as its size, position, and color.
With the mini cart, customers can instantly see the contents of their cart and continue shopping without interrupting their flow.
Step 5: Test and Publish
Before you go live, make sure to test your sticky add to cart bar to ensure it works seamlessly across all devices, especially mobile. Check the button’s visibility, functionality, and responsiveness.
Once you’re satisfied with how the sticky bar looks and works, publish the changes, and your customers will immediately experience a smoother shopping journey.
Additional Tips for Optimizing the Sticky Add to Cart Bar
While the sticky add to cart bar is a powerful feature, there are a few additional things you can do to optimize its effectiveness:
1. Use High-Quality Product Images
Make sure your product images are high-quality and optimized for faster loading. Clear and attractive images will encourage users to add items to their cart.
2. Add Custom Text or CTA Buttons
Consider customizing the button’s text or call-to-action (CTA). Instead of the generic “Add to Cart” text, you can use something more enticing like “Buy Now” or “Quick Add” to encourage quicker action.
3. Limit Distractions
Keep the sticky add to cart bar minimalistic and free from distractions. Avoid overwhelming the customer with too much information, as a clean and simple button is more effective.
4. Test Placement
Experiment with the placement of the sticky add to cart bar. Depending on your store’s design, the button might be more effective at the bottom of the screen rather than the top, or vice versa.
Check out the useful insight about the Customize my Account page to enhance your store’s shopping experience!
FAQs
1. What is a sticky add to cart bar?
A sticky add to cart bar is a feature that keeps the “Add to Cart” button visible at all times while customers scroll through a product page, making it easy for them to add items to their cart.
2. How does a sticky add to cart bar improve conversion rates?
By keeping the “Add to Cart” button visible, customers are more likely to make quick purchases without having to scroll back up, which leads to higher conversion rates.
3. What is a mini cart for WooCommerce?
A mini cart for WooCommerce is a small, pop-up cart that displays the items the customer has added to their cart. It allows for quick checkout without leaving the product page.
4. How can I add a mini cart to my WooCommerce store?
You can easily add a mini cart for WooCommerce by installing plugins like WooCommerce Sticky Add to Cart by Extendons. The plugin allows for easy integration of a mini cart along with the sticky add to cart bar.
5. Can I customize the sticky add to cart bar design?
Yes, most sticky add to cart plugins, including WooCommerce Sticky Add to Cart by Extendons, allow you to customize the design, including the button’s color, size, and text.
Conclusion
A sticky add to cart bar is a powerful tool for improving your WooCommerce store’s shopping experience. By keeping the “Add to Cart” button visible and integrating a mini cart for WooCommerce, you can create a seamless and convenient shopping journey for your customers. With tools like the WooCommerce Sticky Add to Cart by Extendons, you can easily set up and customize this feature to suit your store’s needs and branding.
Investing in these small but impactful improvements can lead to higher customer satisfaction, better conversion rates, and ultimately, increased sales for your WooCommerce store.


Leave a Reply