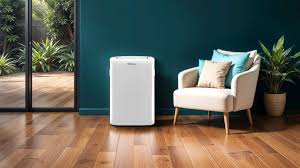
A portable air conditioner is an excellent solution for cooling small spaces without the hassle of permanent installation. The Hisense portable air conditioner is a reliable and efficient choice for those seeking flexible cooling options. This step-by-step guide will walk you through installing and using your Hisense portable air conditioner to ensure optimal performance and comfort.
Why Choose a Hisense Portable Air Conditioner?
Hisense portable air conditioners offer a perfect blend of performance, energy efficiency, and ease of use. With advanced features such as remote control operation, adjustable temperature settings, and multiple fan speeds, these units provide customizable comfort for any room. Additionally, their portability makes them ideal for renters or anyone who needs a temporary cooling solution.
Step 1: Unboxing and Preparing the Unit
When you unbox your Hisense portable air conditioner, ensure all components are included:
- The main AC unit
- Exhaust hose
- Window slider kit
- Remote control (with batteries)
- User manual
Inspect the unit and accessories for any visible damage. Before proceeding, identify a suitable location near a power outlet and a window for ventilation. Ensure the area is clear of obstructions and provides adequate airflow.
Step 2: Assembling the Exhaust Hose and Window Kit
To efficiently cool your room, the Hisense portable air conditioner requires proper ventilation to expel hot air. Follow these steps to set up the exhaust system:
-
Connect the Exhaust Hose to the Unit
- Locate the exhaust port at the back of the AC unit.
- Attach one end of the exhaust hose to the port and secure it firmly.
-
Prepare the Window Kit
- Adjust the slider kit to fit your window’s dimensions.
- Insert the kit into the window frame, ensuring a snug fit.
-
Attach the Exhaust Hose to the Window Kit
- Connect the other end of the exhaust hose to the designated slot in the window kit.
- Secure it tightly to prevent air leaks.
Close the window to hold the kit in place. Ensure there are no gaps for hot air to re-enter the room.
Step 3: Plugging in and Powering Up
Once the exhaust system is in place, plug the unit into a grounded power outlet. Avoid using extension cords or power strips, as they may not handle the energy load required by the air conditioner.
Press the power button on the unit or use the remote control to turn it on.
Step 4: Configuring the Settings
The Hisense portable air conditioner offers various settings to customize your cooling experience:
-
Select the Mode
- Most models have multiple modes, such as Cool, Fan, Dry (dehumidifier), and Auto. Choose the appropriate mode based on your needs.
-
Adjust the Temperature
- Use the control panel or remote to set your desired temperature.
-
Choose Fan Speed
- Select from low, medium, or high fan speeds to control airflow intensity.
-
Set the Timer
- Some models include a timer feature to automatically turn the unit on or off at specific times.
Step 5: Maintaining Your Hisense Portable AC
Regular maintenance ensures your air conditioner operates efficiently and extends its lifespan. Here’s how to care for your unit:
-
Clean the Filters
- Remove and wash the air filters every two weeks or as recommended in the user manual. Dirty filters reduce airflow and efficiency.
-
Empty the Water Tank
- Depending on humidity levels, the unit may collect moisture. Empty the tank regularly or connect a drain hose for continuous drainage.
-
Inspect the Exhaust Hose
- Ensure the hose is free of kinks or obstructions that may restrict airflow.
-
Wipe Down the Unit
- Use a soft, damp cloth to clean the exterior of the unit. Avoid using harsh chemicals.
Tips for Optimal Performance
- Placement: Position the unit in the center of the room for even cooling. Avoid placing it near heat sources or direct sunlight.
- Room Size: Ensure the unit’s cooling capacity matches your room size. A unit that is too small will struggle to cool the space, while an oversized unit may cycle on and off too frequently.
- Sealing: Check that the window kit and exhaust hose are properly sealed to prevent heat infiltration.
Common Troubleshooting Tips
If your Hisense portable air conditioner isn’t performing as expected, consider these troubleshooting tips:
- Insufficient Cooling: Check for blockages in the exhaust hose, clean the filters, and ensure the room size matches the unit’s capacity.
- Water Leaks: Empty the water tank or ensure the drain hose is properly connected.
- Unresponsive Controls: Replace remote control batteries and confirm the unit is plugged in securely.
Conclusion
The Hisense portable air conditioner is a versatile and user-friendly cooling solution for any home or office. By following this step-by-step guide, you can ensure seamless installation, effective operation, and long-term performance. Enjoy the comfort of a perfectly cooled space, even on the hottest days!
Would you like more details on any of these steps or troubleshooting tips?


Leave a Reply